GET YOUR BUSINESS GOOGLE GUARANTEED
Follow the steps of this guide to get your business listed as a Google Guaranteed Business
Let’s get started…
STEP 1: CREATE A GOOGLE LOCAL SERVICE ACCOUNT & CREATE YOUR BUSINESS PROFILE
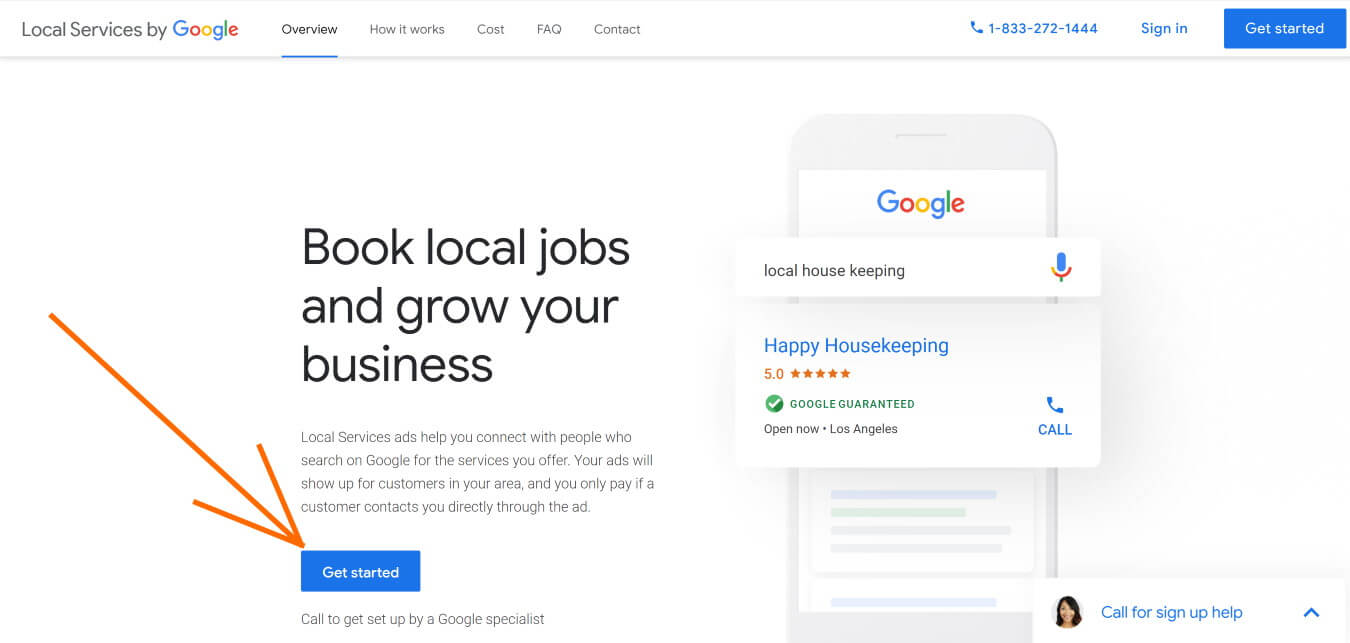
1. First, go to the Local Services by Google signup page found at the following link, and click on the blue GET STARTED button.
- https://ads.google.com/localservices/signup
- This link will open in a new tab
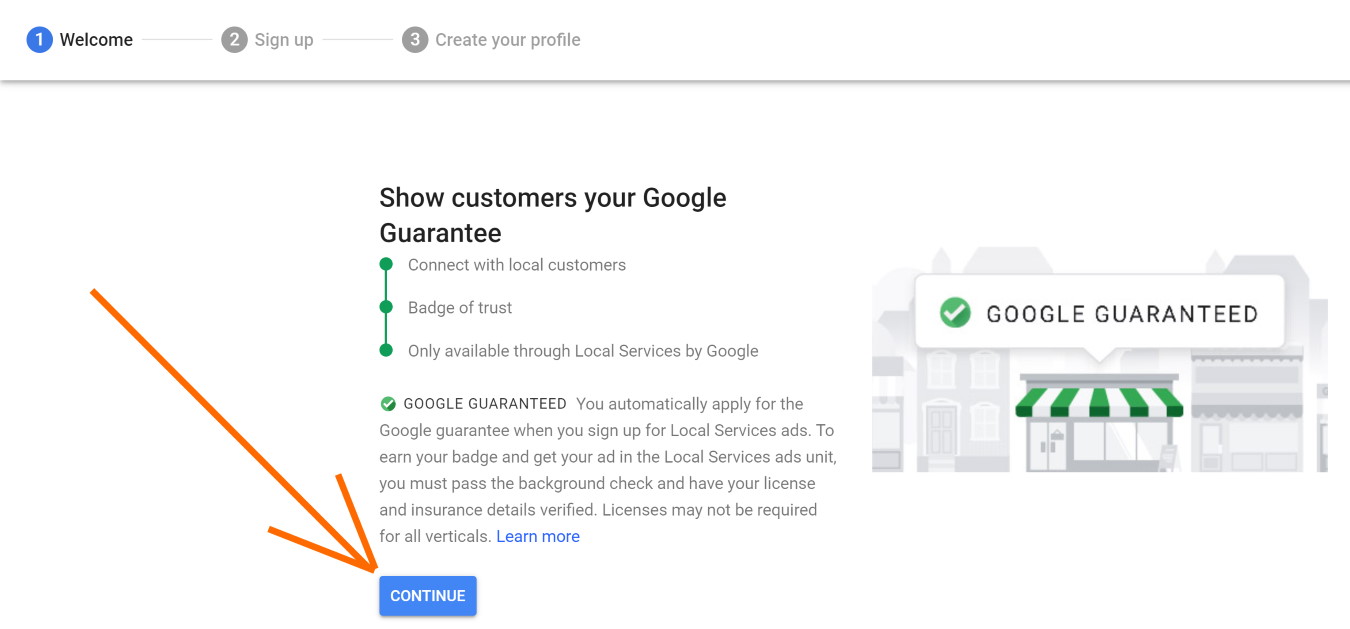
2. Click on the blue CONTINUE button on the next Welcome Page
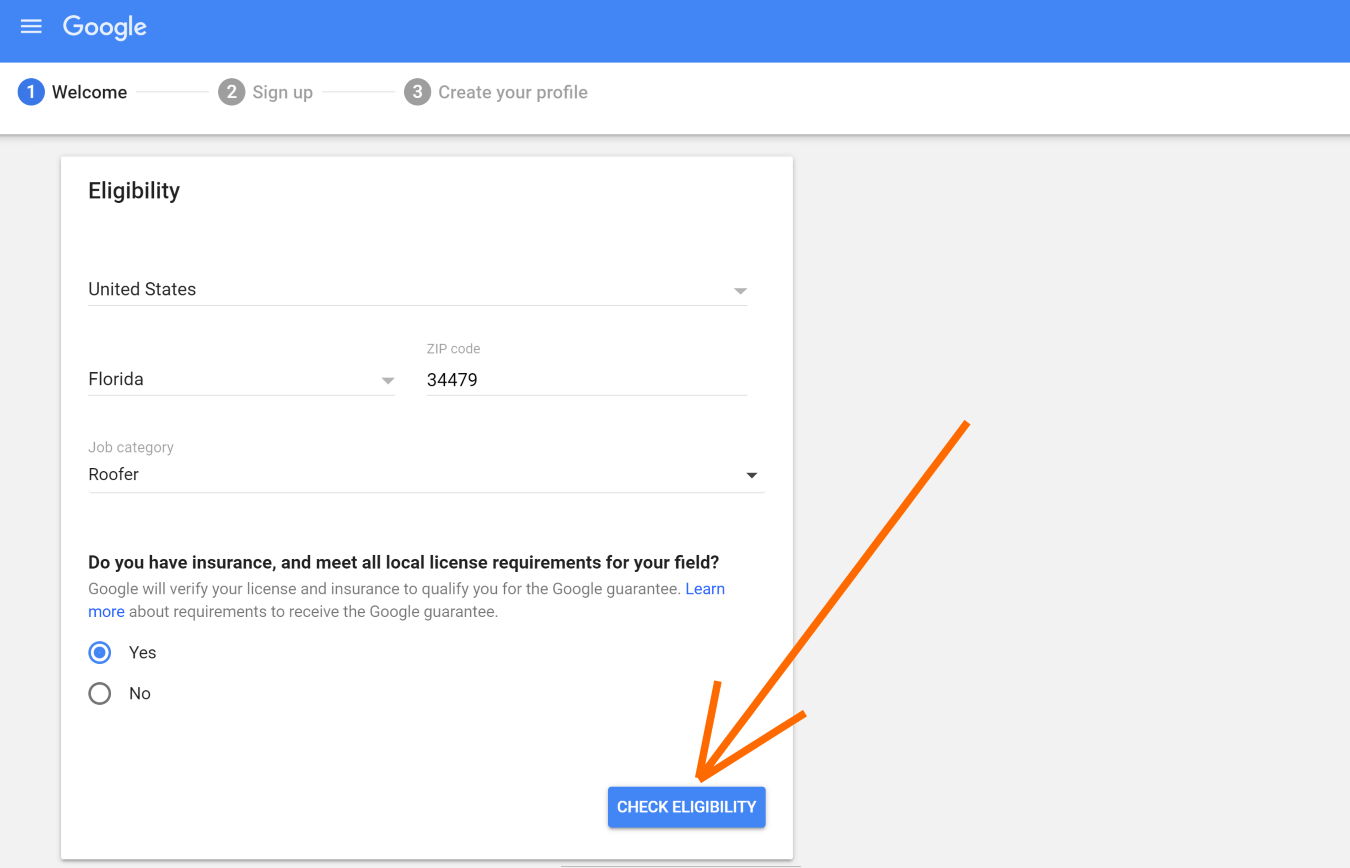
3. Choose the COUNTY, STATE & add the ZIP CODE for your business. Select the correct JOB CATEGORY for the services you provide. Then check YES that your business has insurance and meets all local requirements to provide services in your city. Last, click on the blue CHECK ELIGIBILITY button.
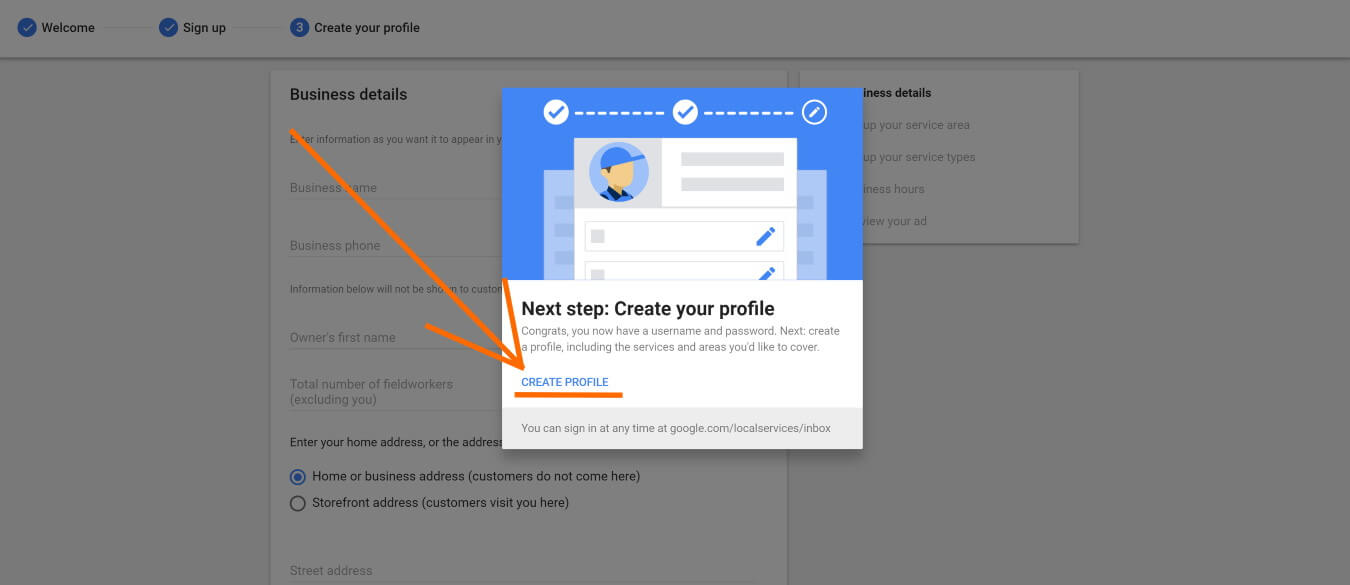
4. If your business is eligible, you will now see a Next Step: Create Your Profile prompt. Click on the blue CREATE PROFILE link to continue.
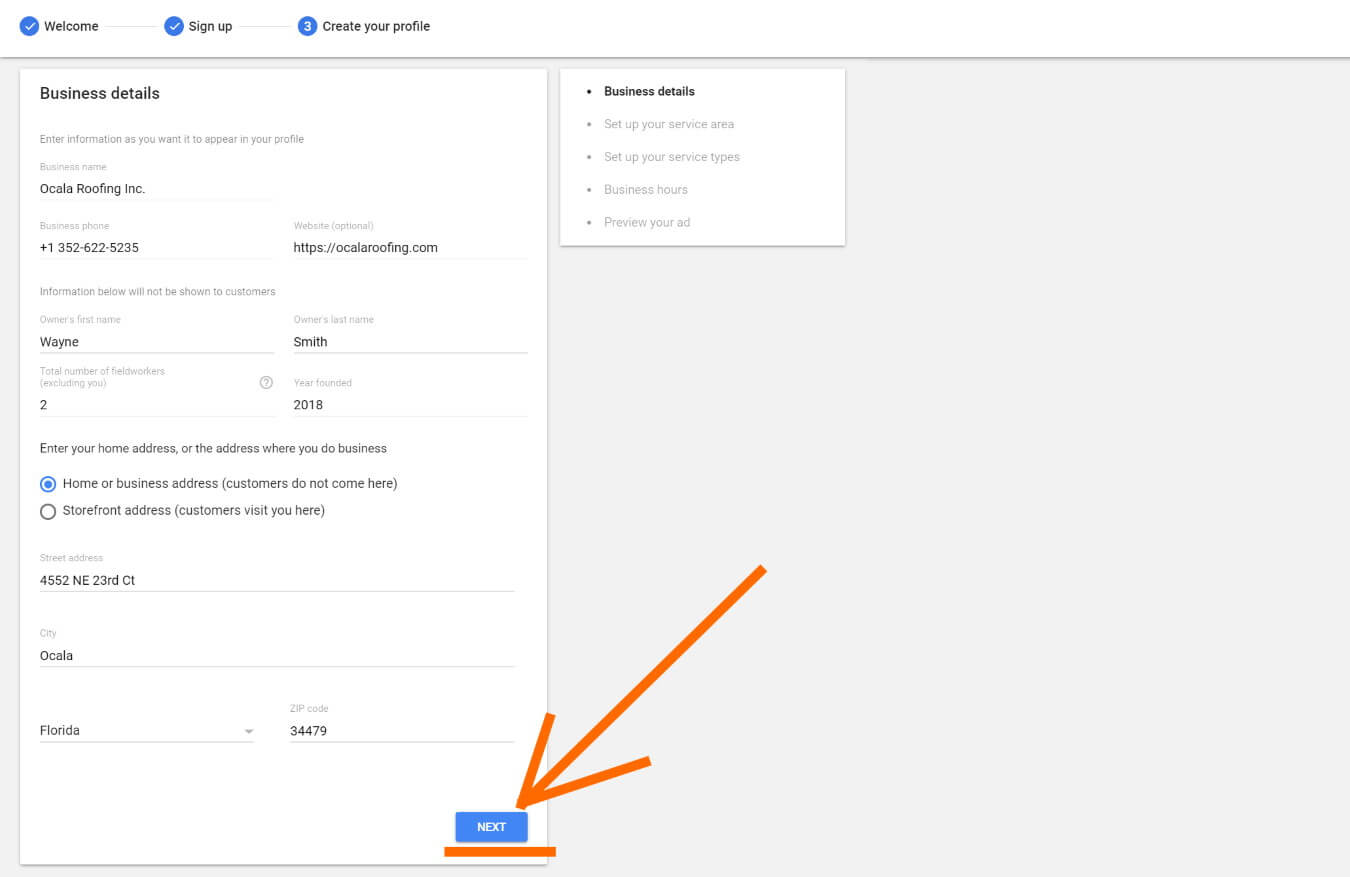
5. Add your business information and click on the blue NEXT button.
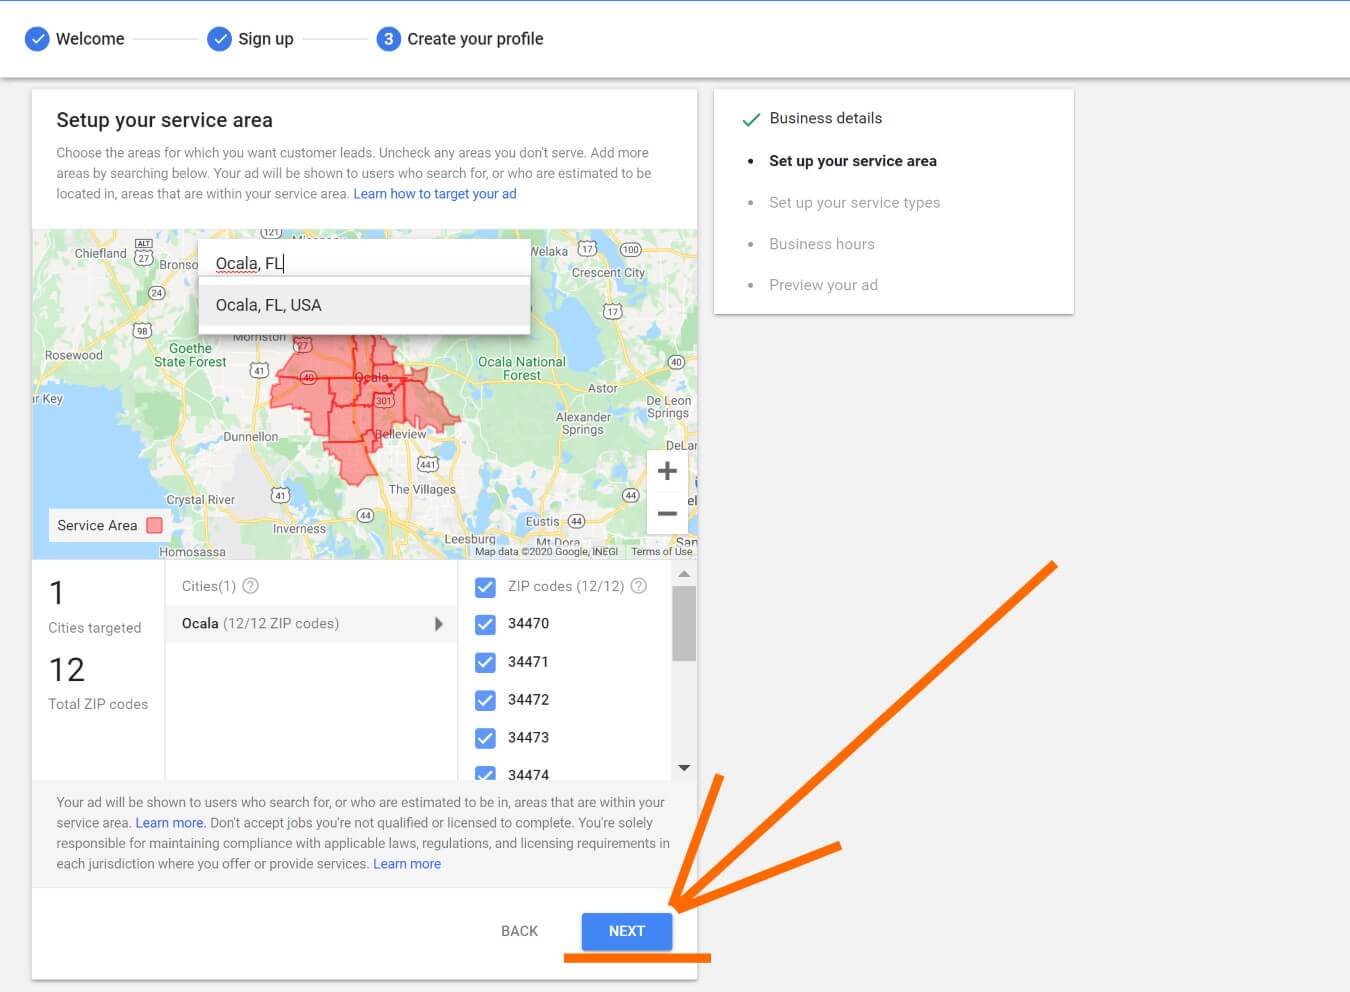
6. Type in your business’s service area(s) in the city/zip box, and select the correct location to add the areas you provide services to. Then click the NEXT button.
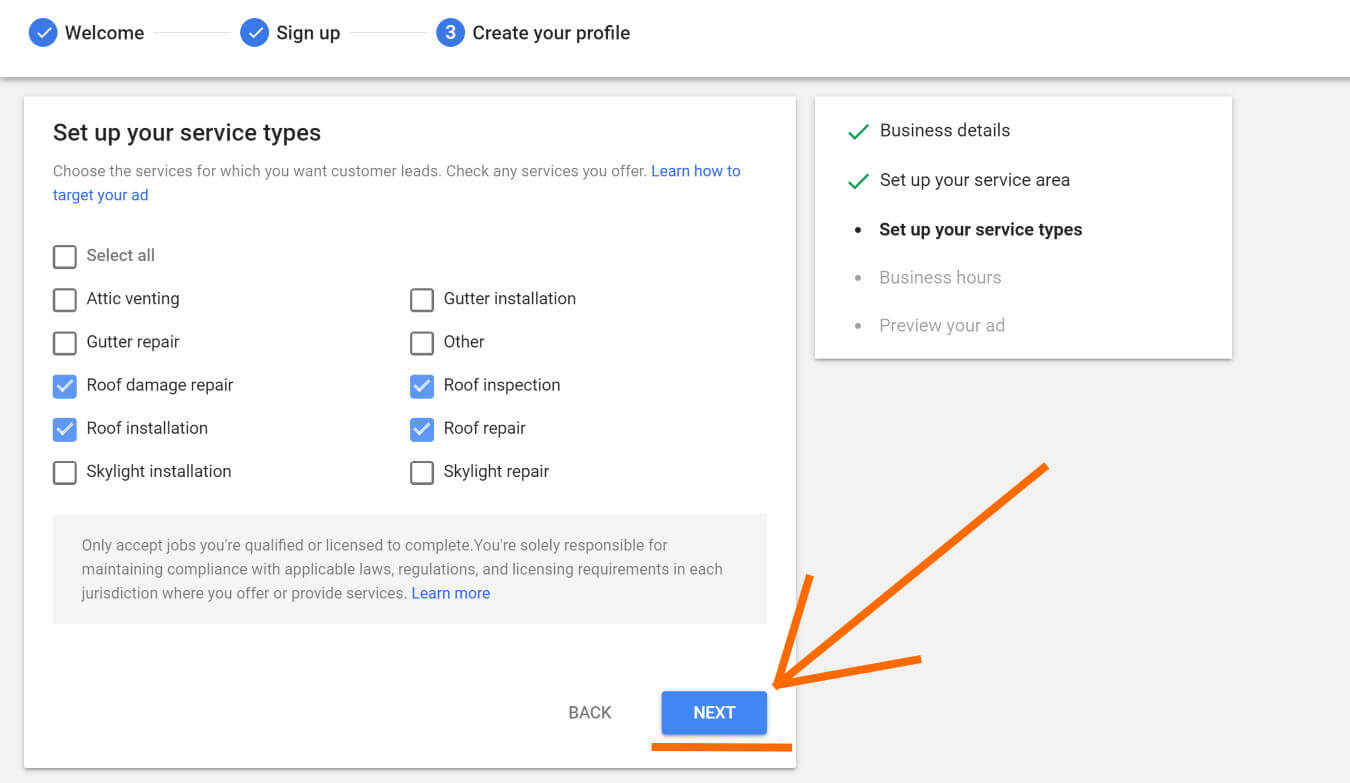
7. Select all of the Service Types your business provides locally, and click on the blue NEXT button.
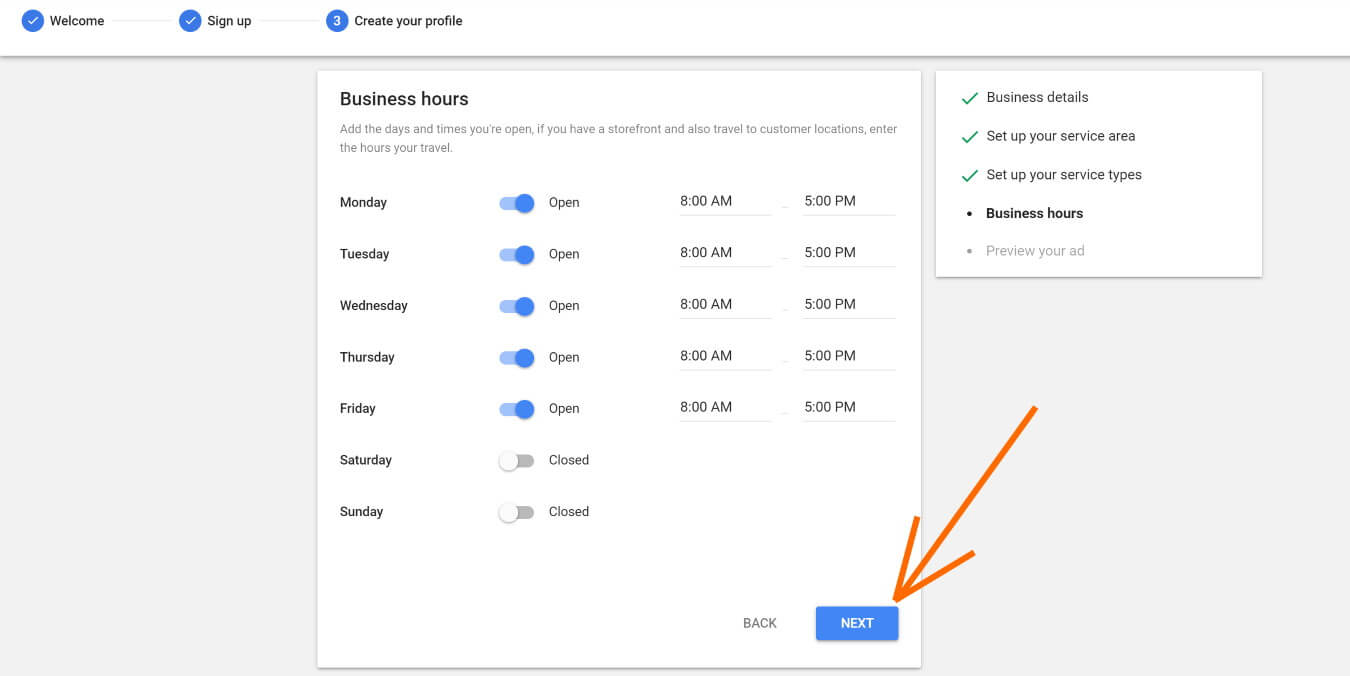
8. Add your business hours, and click on the blue NEXT button.
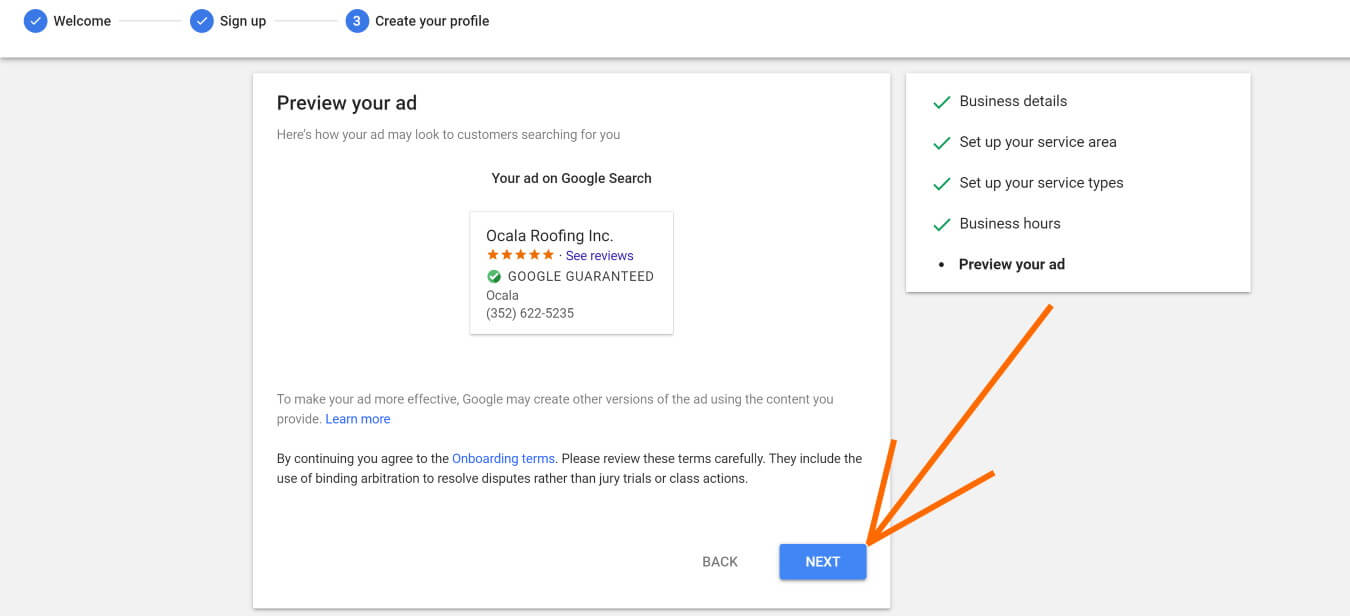
9. You will then be presented what your Google Local Service Ad will appear like. Verify that the information is correct and click on the blue NEXT button.
You have now successfully created your Local Services by Google Profile for your business!
STEP 2: GET 1 REVIEW FOR YOUR BUSINESS USING PROVIDED LINK
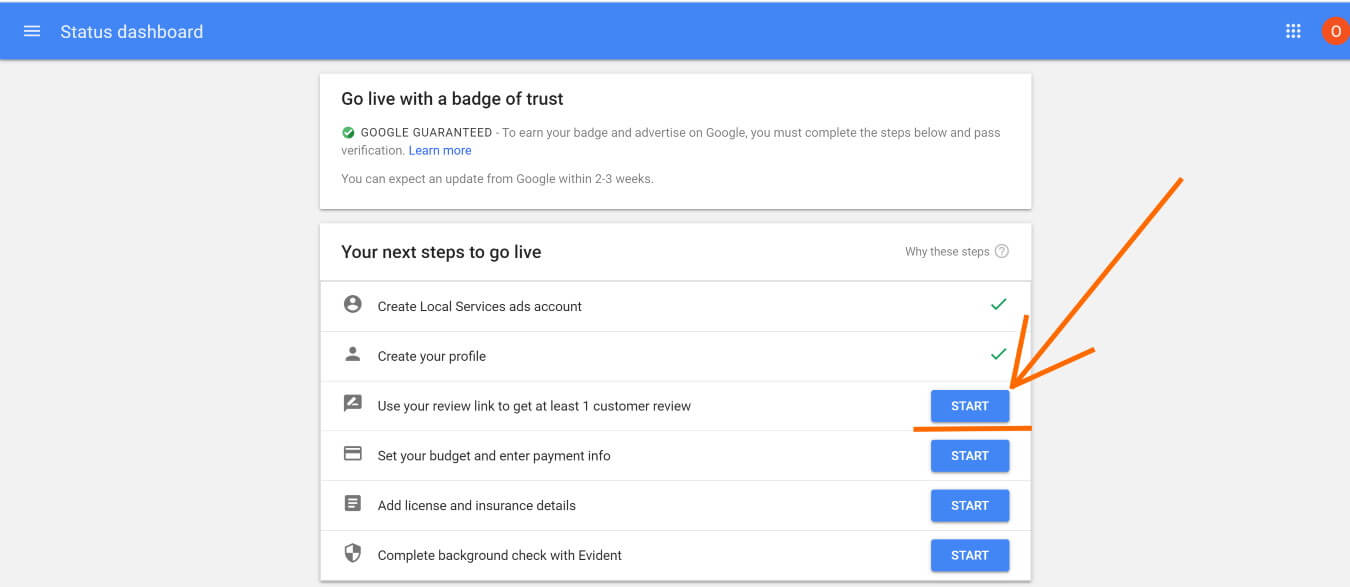
On the next screen, click on the blue START button to get your business’s Local Services by Google profile review link…
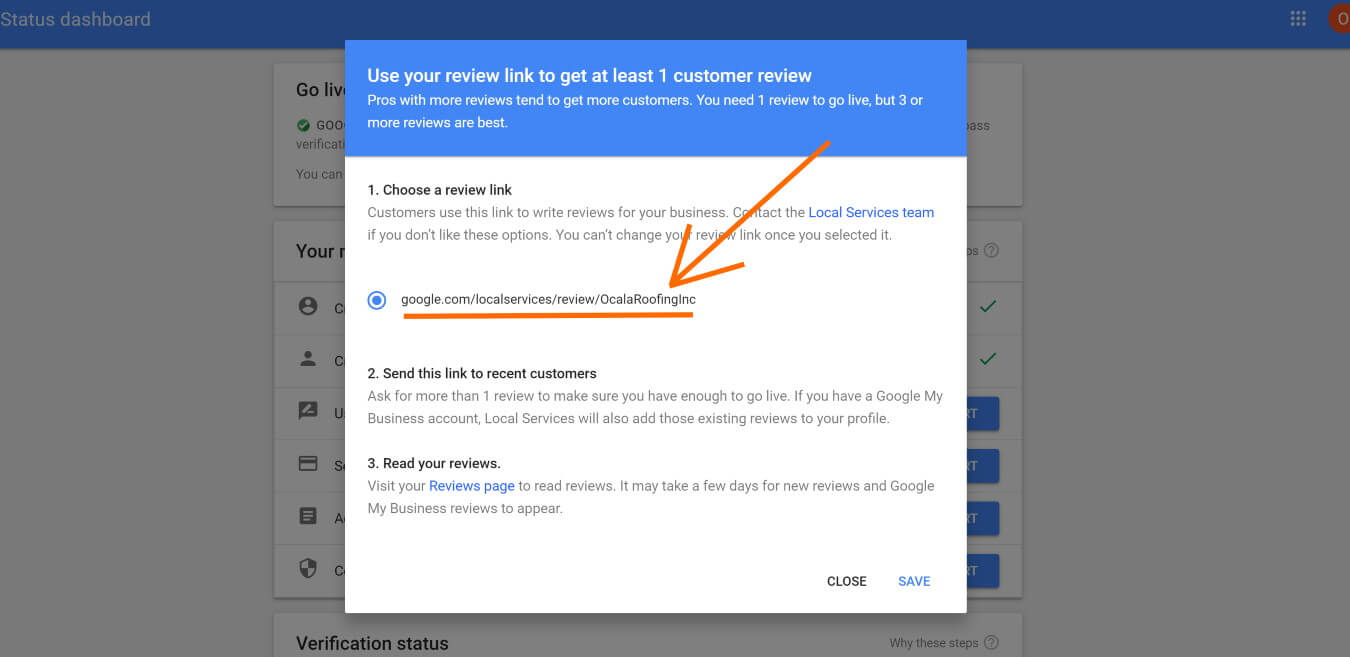
Within the popup that appears, you will see the instructions to use your Google Review link to acquire at least 1 review by sending it to recent customers to leave a review for your business.
Copy this link and send by email / text/ social message to as many recent customers kindly asking them to leave a positive review of their experience with your business.
After copying the link to use, make sure to click on the blue SAVE link at the bottom to activate the review link.
STEP 3: SET YOUR AD BUDGET & PROVIDE PAYMENT INFORMATION
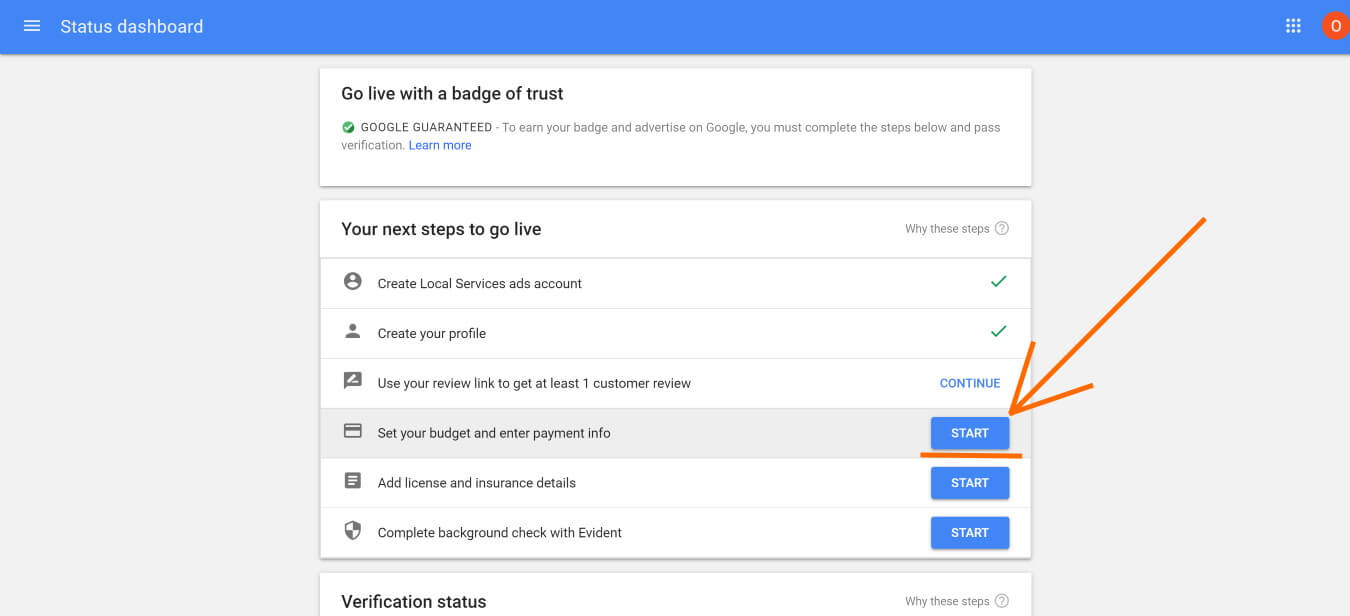
Next, click on the blue START button to set your ad budget and enter payment information for ad payments.
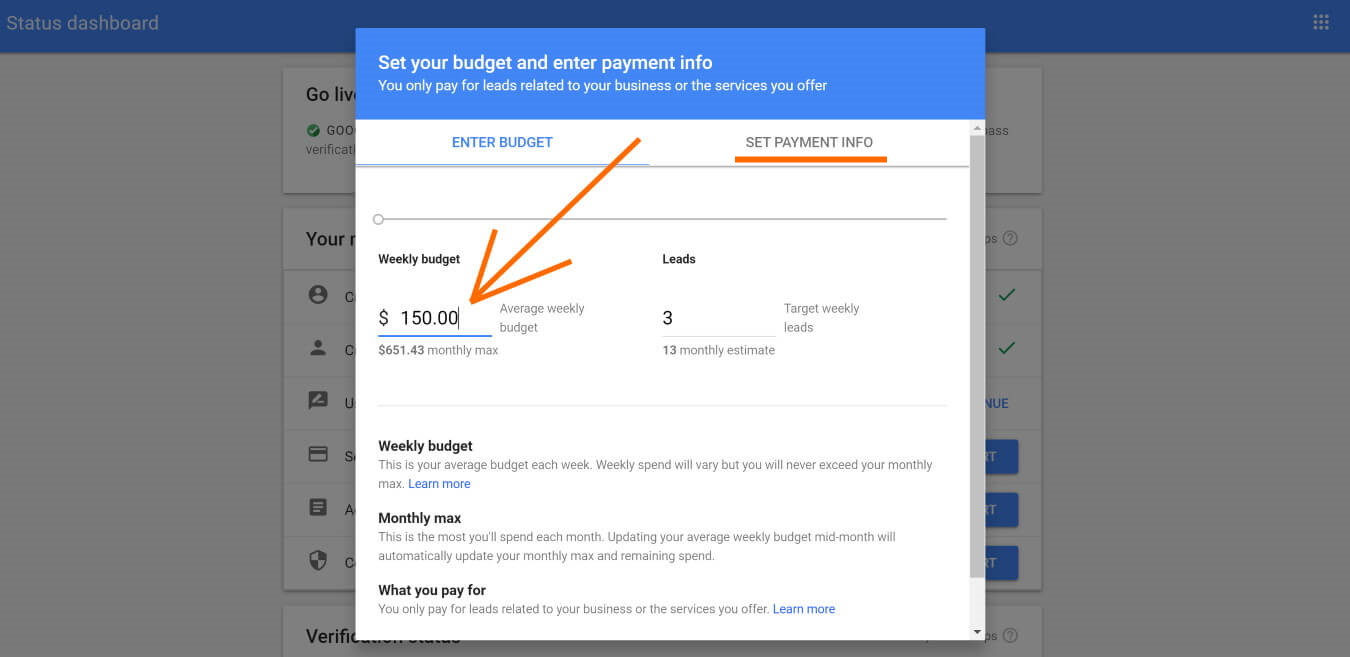
Within the popup, set your Weekly Ad Budget of a minimum of $150 per week.
Then, click on the SET PAYMENT INFO link at the top of the popup to add your business payment information.
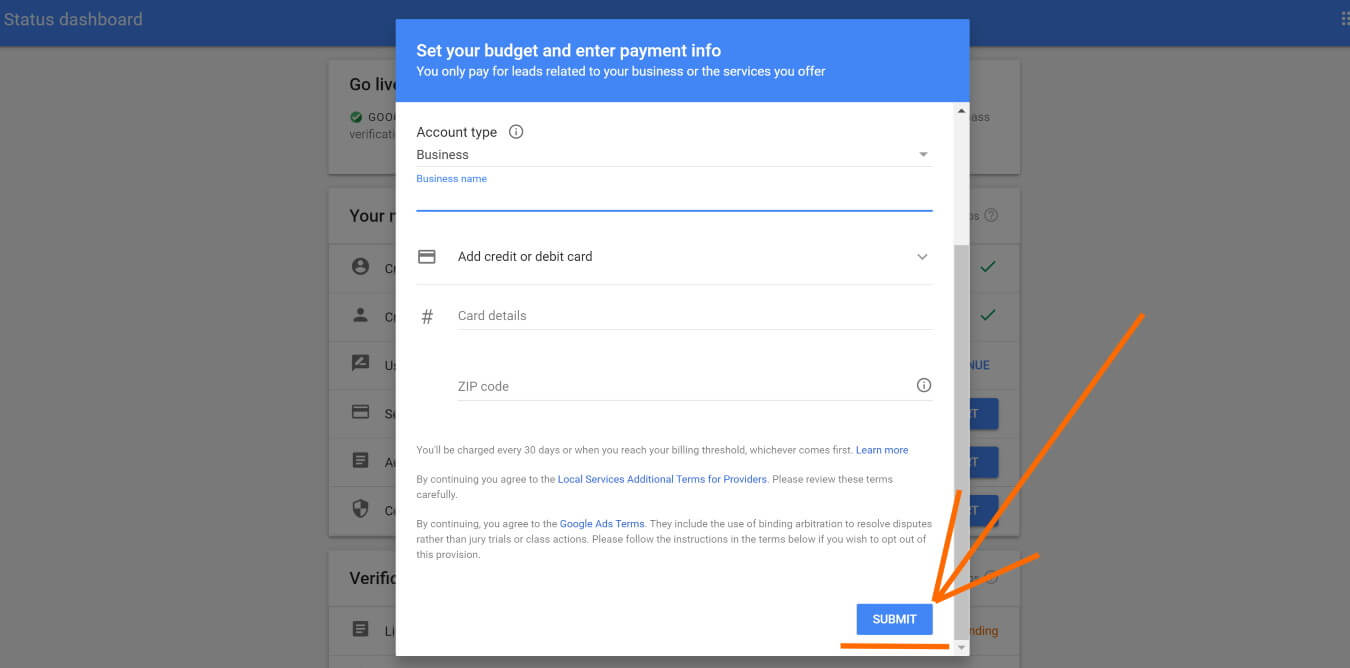
Add your business’s credit card or debit card information, then click on the blue SUBMIT button.
STEP 4: ADD YOUR LICENSE & BUSINESS INSURANCE DETAILS
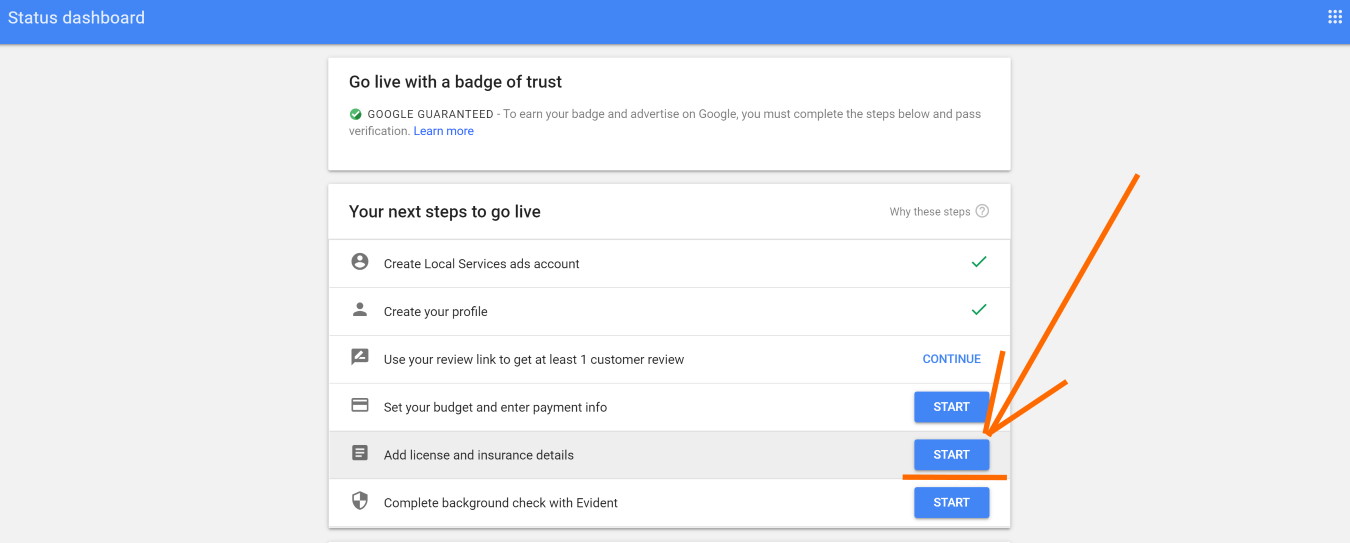
Click on the blue START button for “Add license and insurance details” to add needed information for your business…
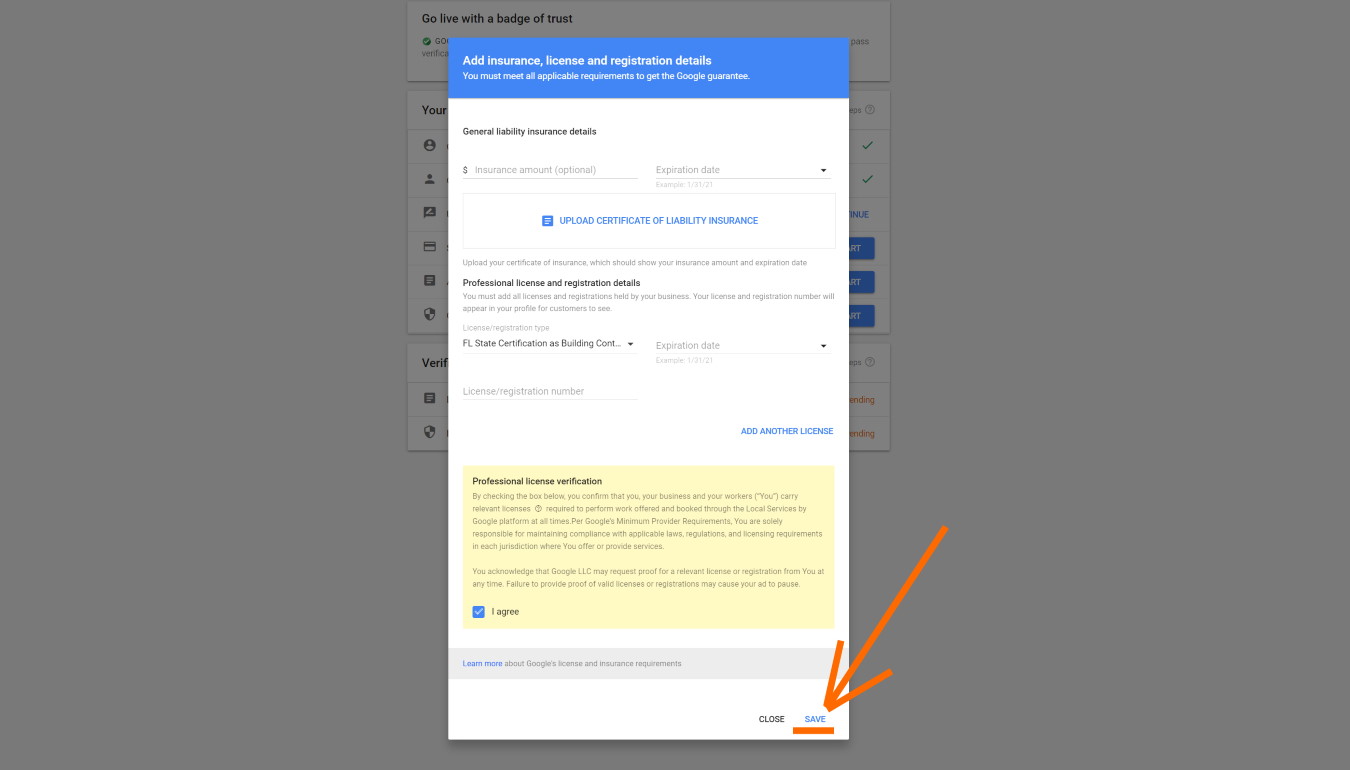
First, Add your Insurance Information & upload a copy of your business’s CERTIFICATE OF LIABILITY INSURANCE document.
Then, add all licenses and registrations held by your business.
Next, check the I agree box to confirm that your business carries all licenses required to provide services in your area.
Last, click on the blue SAVE link found at the very bottom of the popup.
STEP 5: COMPLETE YOUR BACKGROUND CHECKS WITH EVIDENT
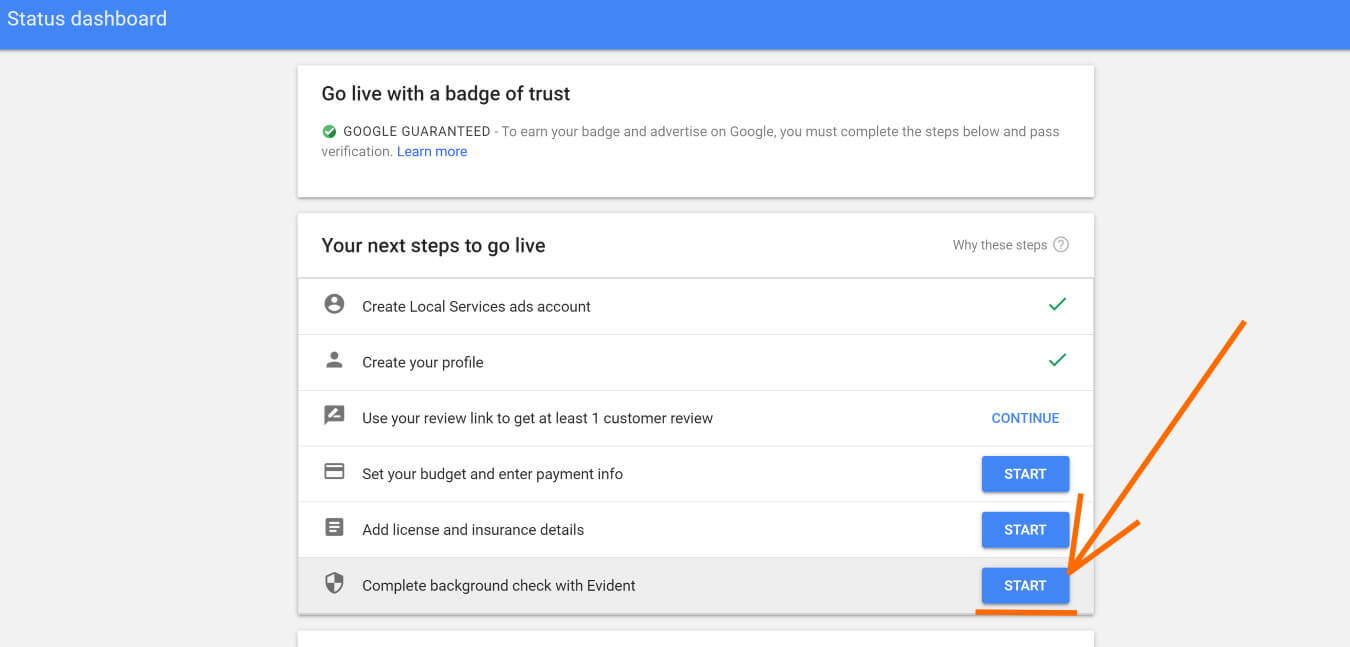
Click on the blue START button for “Complete background check with Evident” to submit required background check information.
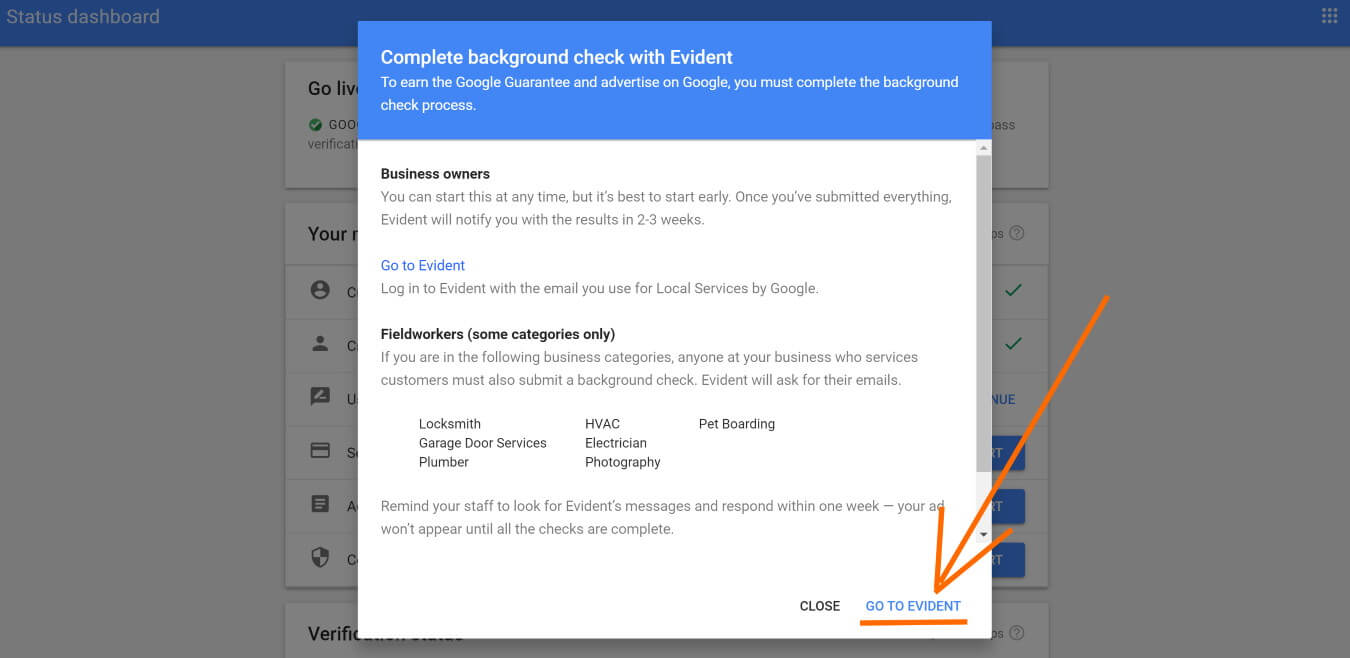
Within the popup, you will find the instructions of what is needed to provide background check information. Click on the GO TO EVIDENT link at the bottom to proceed.
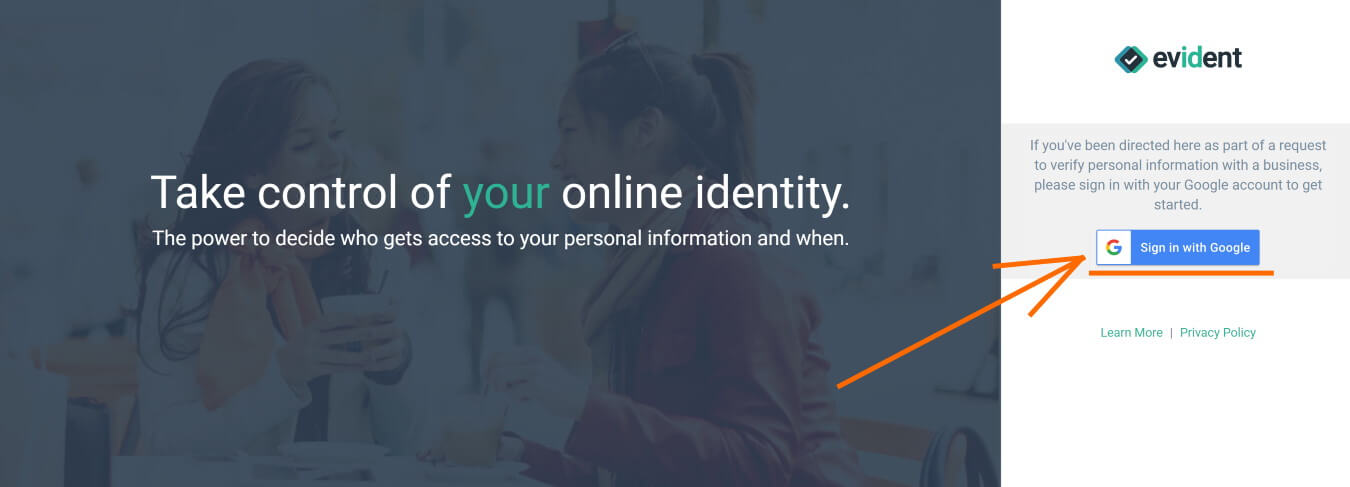
You will be taken to EvidentID.com.
Click on the SIGN IN WITH GOOGLE button.
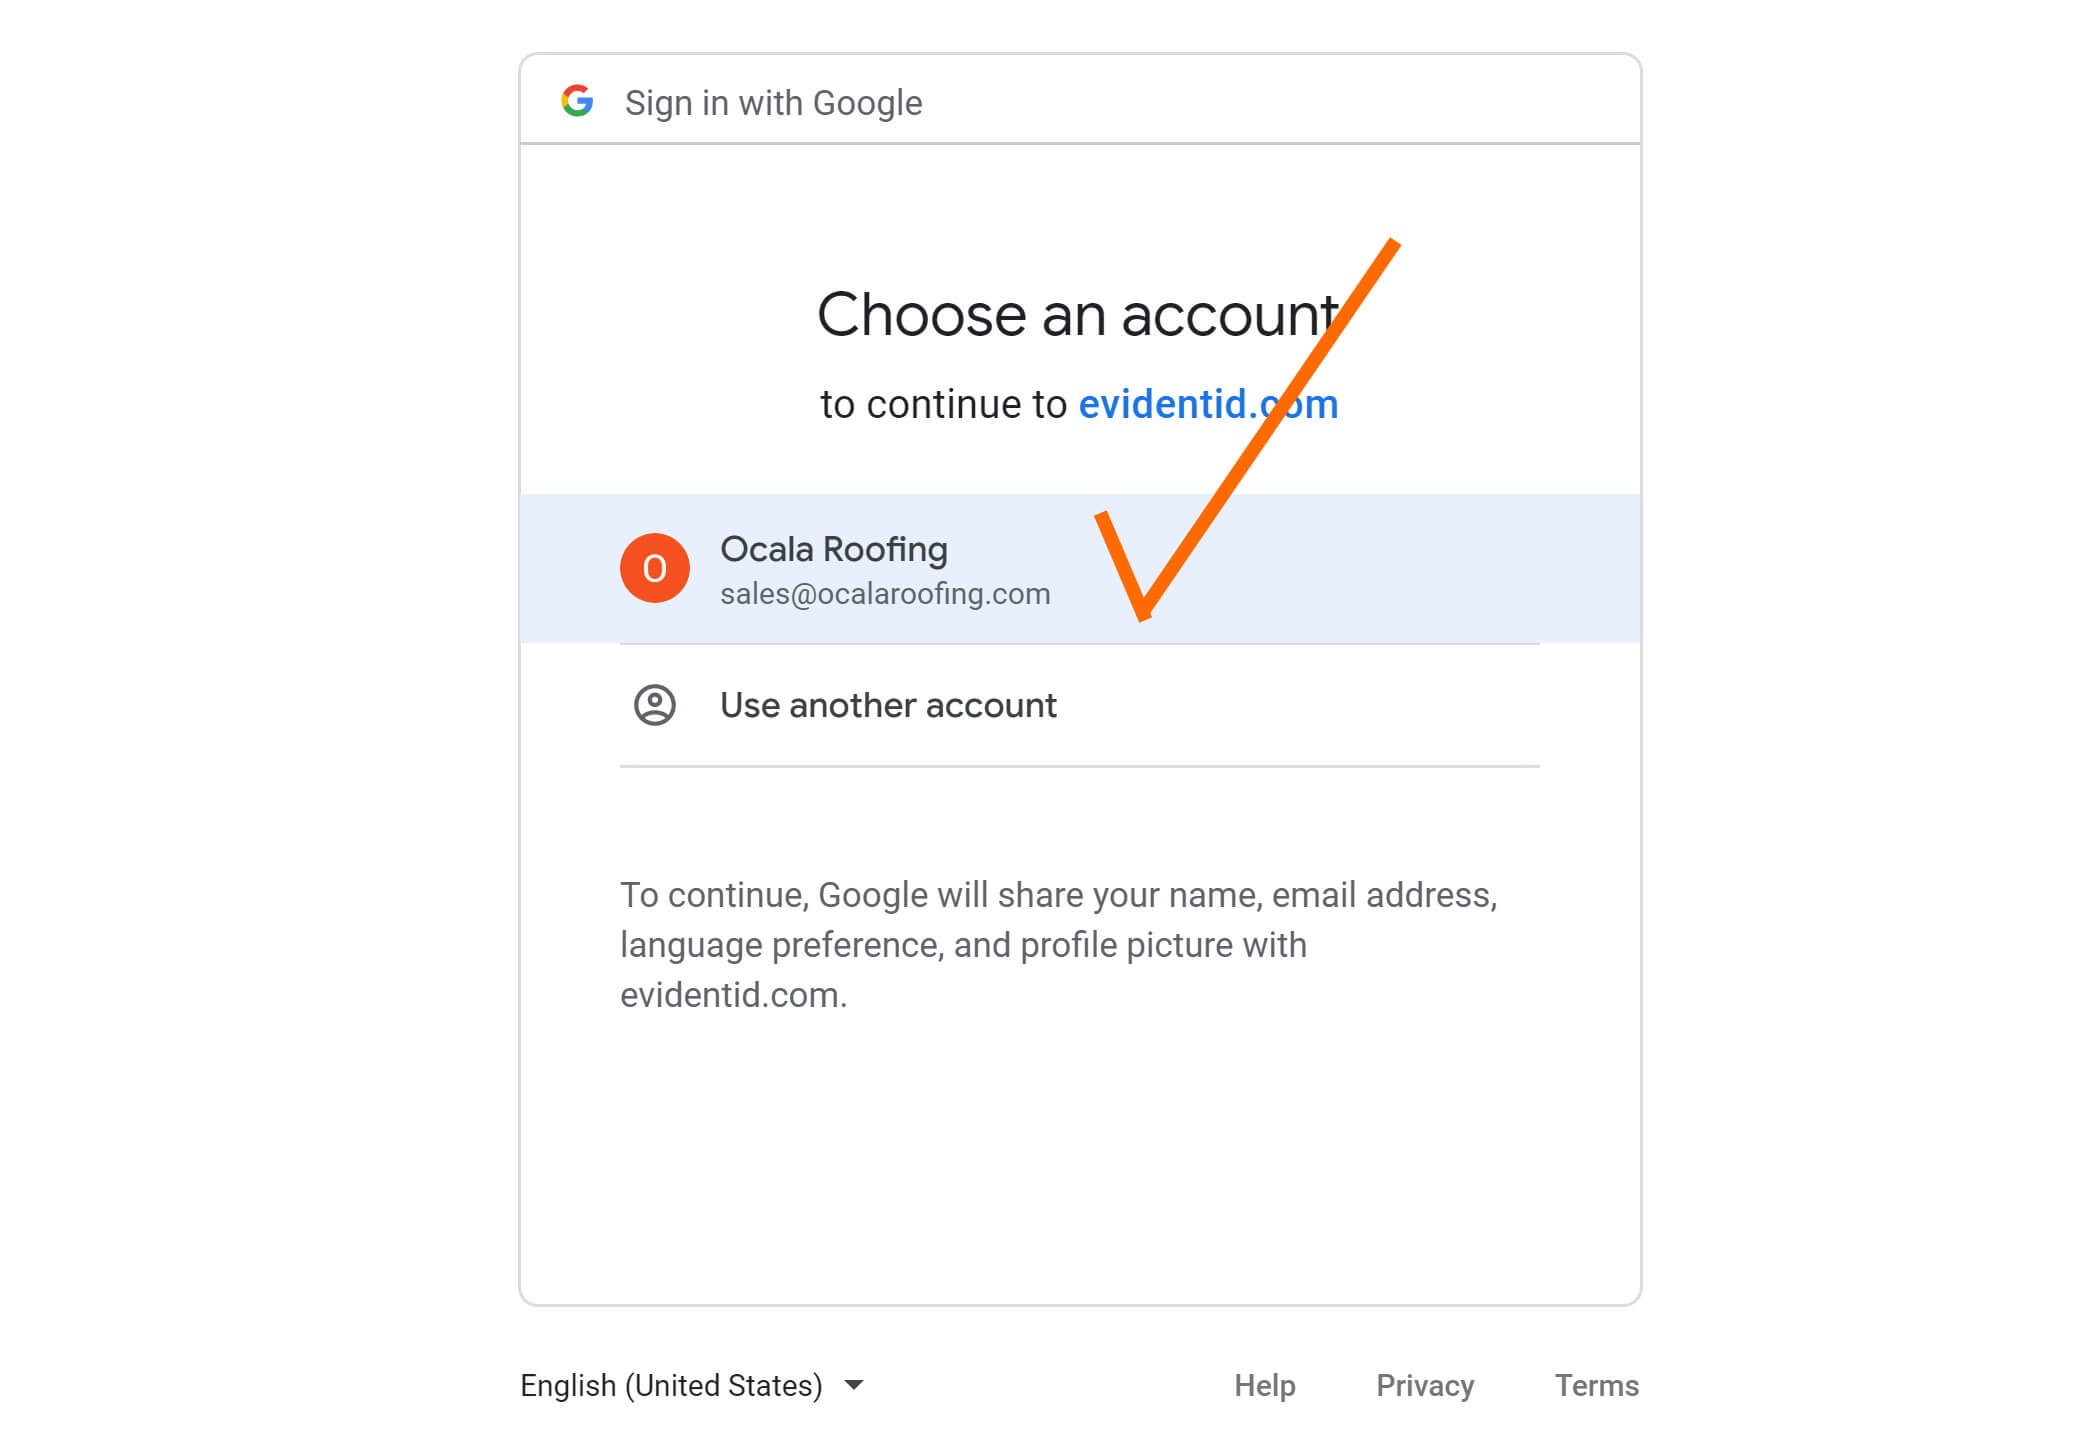
*IMPORTANT*
Make sure you are signing in with the same Google Account that was used to setup your Local Services By Google Account.
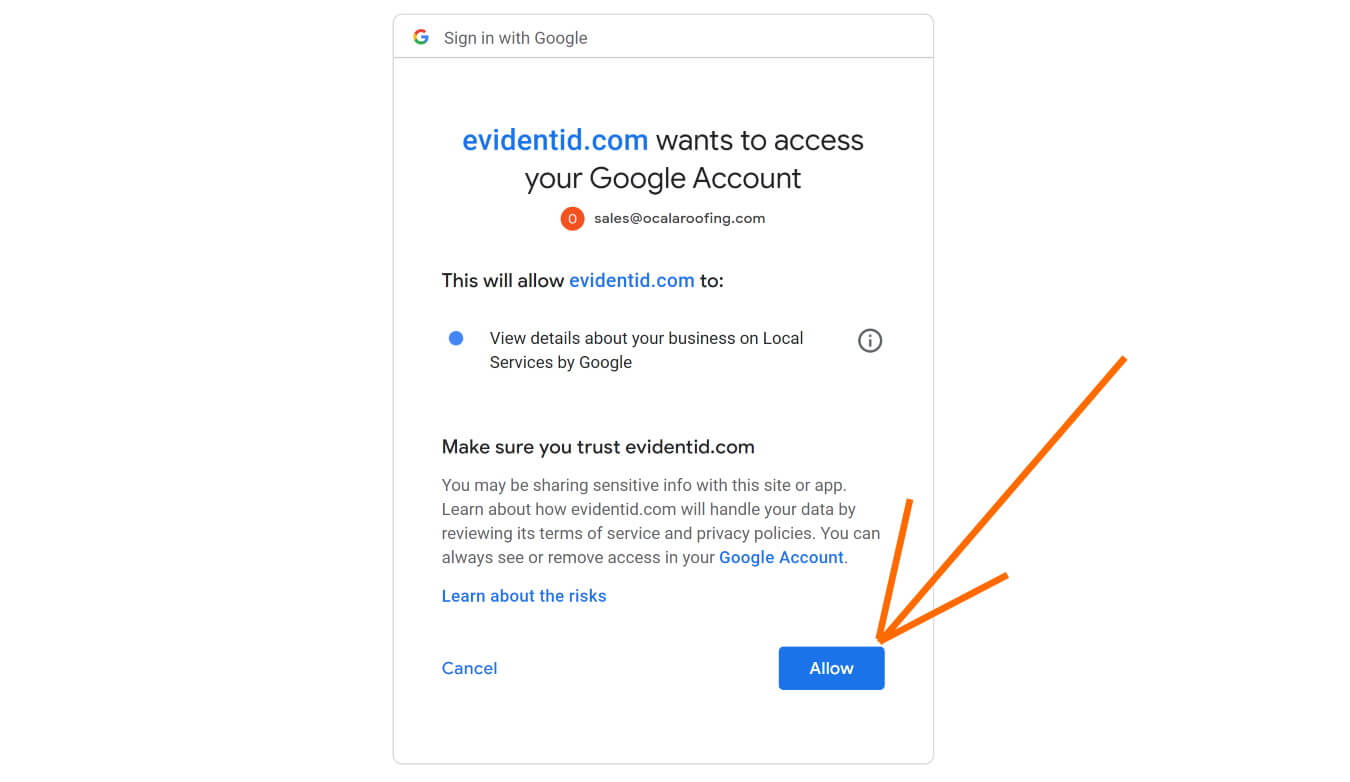
Click on the blue ALLOW button to create your Evident ID account using your Google Account.
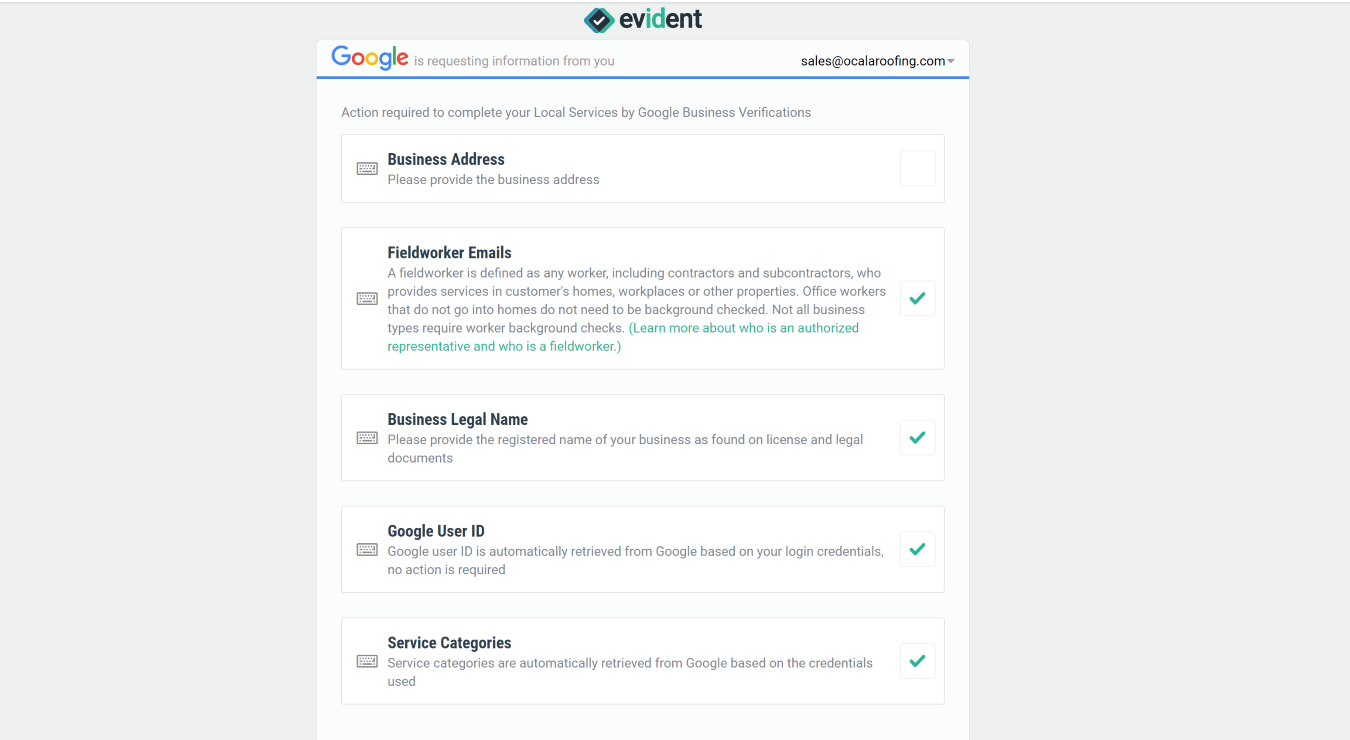
Provide any needed missing information, such as business address, to finish setting up your Evident ID profile.
If all needed information is provided by signing in with Google account, you will be taken to the next page.
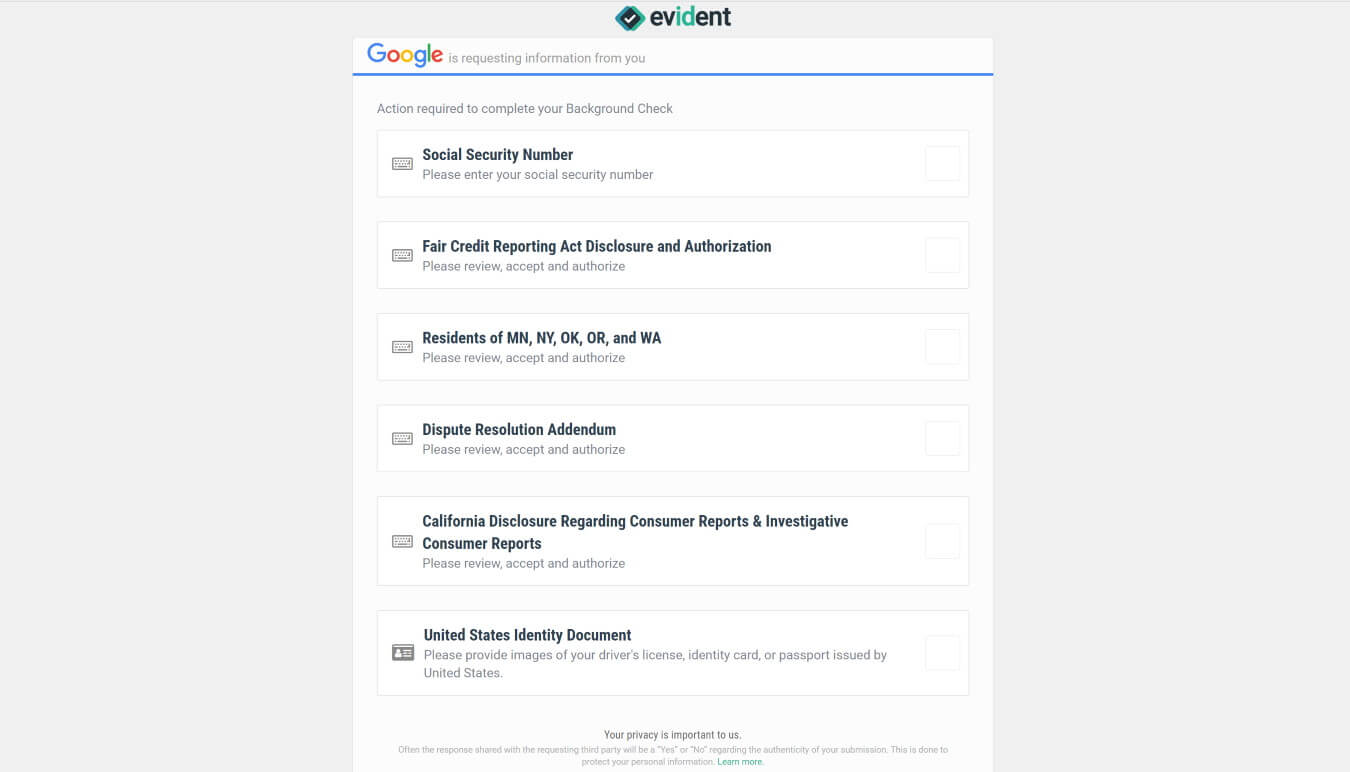
Provide the needed information for each section by clicking on the box to complete.
Evident will then provide needed information to Google to complete your verification process.
CONGRATULATIONS! YOU HAVE COMPLETED ALL STEPS TO GET YOUR BUSINESS GUARANTEED BY GOOGLE
After completing these steps, you will receive an update from Google within 2-3 weeks on your business becoming Google Guaranteed. Your ads will then immediately begin to show after the verification has been successfully completed and approved.
You are able to see when your business has been approved by viewing the Verification Status box found at the very bottom of the Local Services By Google page. Once everything is approved, that status will change from Pending to Approved, and your ads will begin immediately showing in the Local Services Ads found in local search results.

